How To Automate Tickets on Zendesk (for Free)
Zendesk is a behemoth of a CRM. It’s a robust platform for managing customer interactions that provides a myriad of features, which in turn creates many opportunities for automation.
As your customers increase over time, the volume of Zendesk support tickets you receive grows too. Automating those tickets is a game changer for keeping your customer success agents efficient and motivated, instead of stretched thin and with zero bandwidth.
This guide helps you automate most Zendesk support tickets to handle more requests without affecting customer satisfaction. It even covers how to automate complex support tickets and escalations, with the help of Next Matter.

What can you automate on Zendesk?
For this article, we’ll focus on a real-world example: a simple ticket, like a customer that wants to check their order status, which could steal valuable time from your CS agents if it happens at scale.
Later on, you’ll learn how to automate a more intricate example: a complex ticket, like a customer who wants to return a product they bought.
To handle both tickets, you’ll work on several automations that leverage most of Zendesk and Zendesk AI features, plus the Next Matter integration for Zendesk:
- Zendesk Guide, a help center that the customer can use to self-serve their tickets.
- Zendesk automations, which are time-based and can help you track tickets until they’re resolved.
- Zendesk triggers, which are condition-based and can notify the customer whenever a ticket is updated.
- Zendesk Bot Builder, the tool to customize a chatbot that offers quick replies and articles to deflect tickets.
- Zendesk email auto-replies, which are an email-based approach to quick replies and self-serve articles.
- Suggested macros, which can help your CS agents learn from previous actions that have led to solving tickets.
- For the more complex ticket, we’ll use the Next Matter sidebar app, which helps you quickly fire a workflow from any ticket to route it to any needed team member, then track and resolve it.
Here’s what you will need
The goal of this guide is to automate most of your simple Zendesk tickets for free, so to start off you’ll only need a Zendesk account with any plan.
As extra steps, you’ll learn how to automate complex tickets with Next Matter (which you can try with a demo).
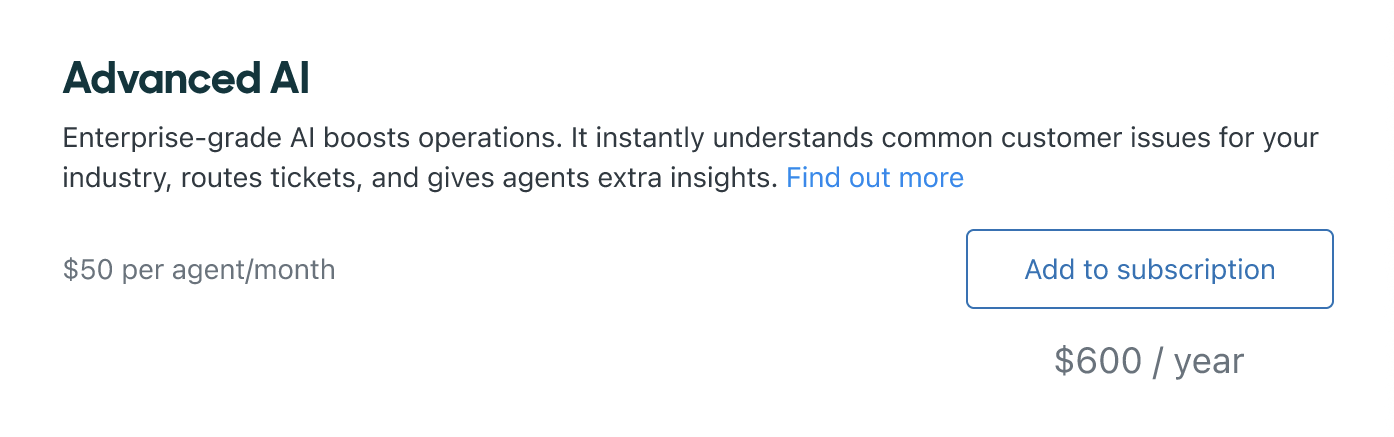
You’ll also find extra automation suggestions that require the Advanced AI add-on for Zendesk (which is $50 per month/agent) or early access to the Zendesk GenAI features (which is free but only lets you use the features while they’re part of the program).
How to automate Zendesk and deflect simple tickets (for free)
Here's how to automate and self-serve several types of simple tickets:
1. Set up your Zendesk help center to self-serve tickets
Doesn’t require the Advanced AI add-on
Although completing this task mainly involves manual work, setting up your help center is a crucial step in providing self-service support for your users.

To enable Help Center, navigate to Zendesk Products > Guide > Get Started. Your Help Center is structured into articles, sections, and categories, and you can customize it to apply your branding.
Then, you can begin creating content and publishing it.
2. Adjust the standard Zendesk automations
Doesn’t require the Advanced AI add-on
Although we will go beyond them, Zendesk offers some native automations that help your CS team maintain and track SLAs for transactional support requests (like a change of address or account lockouts).
You can enable these by navigating to Admin Center, clicking Objects and Rules, then Business Rules > Automations.
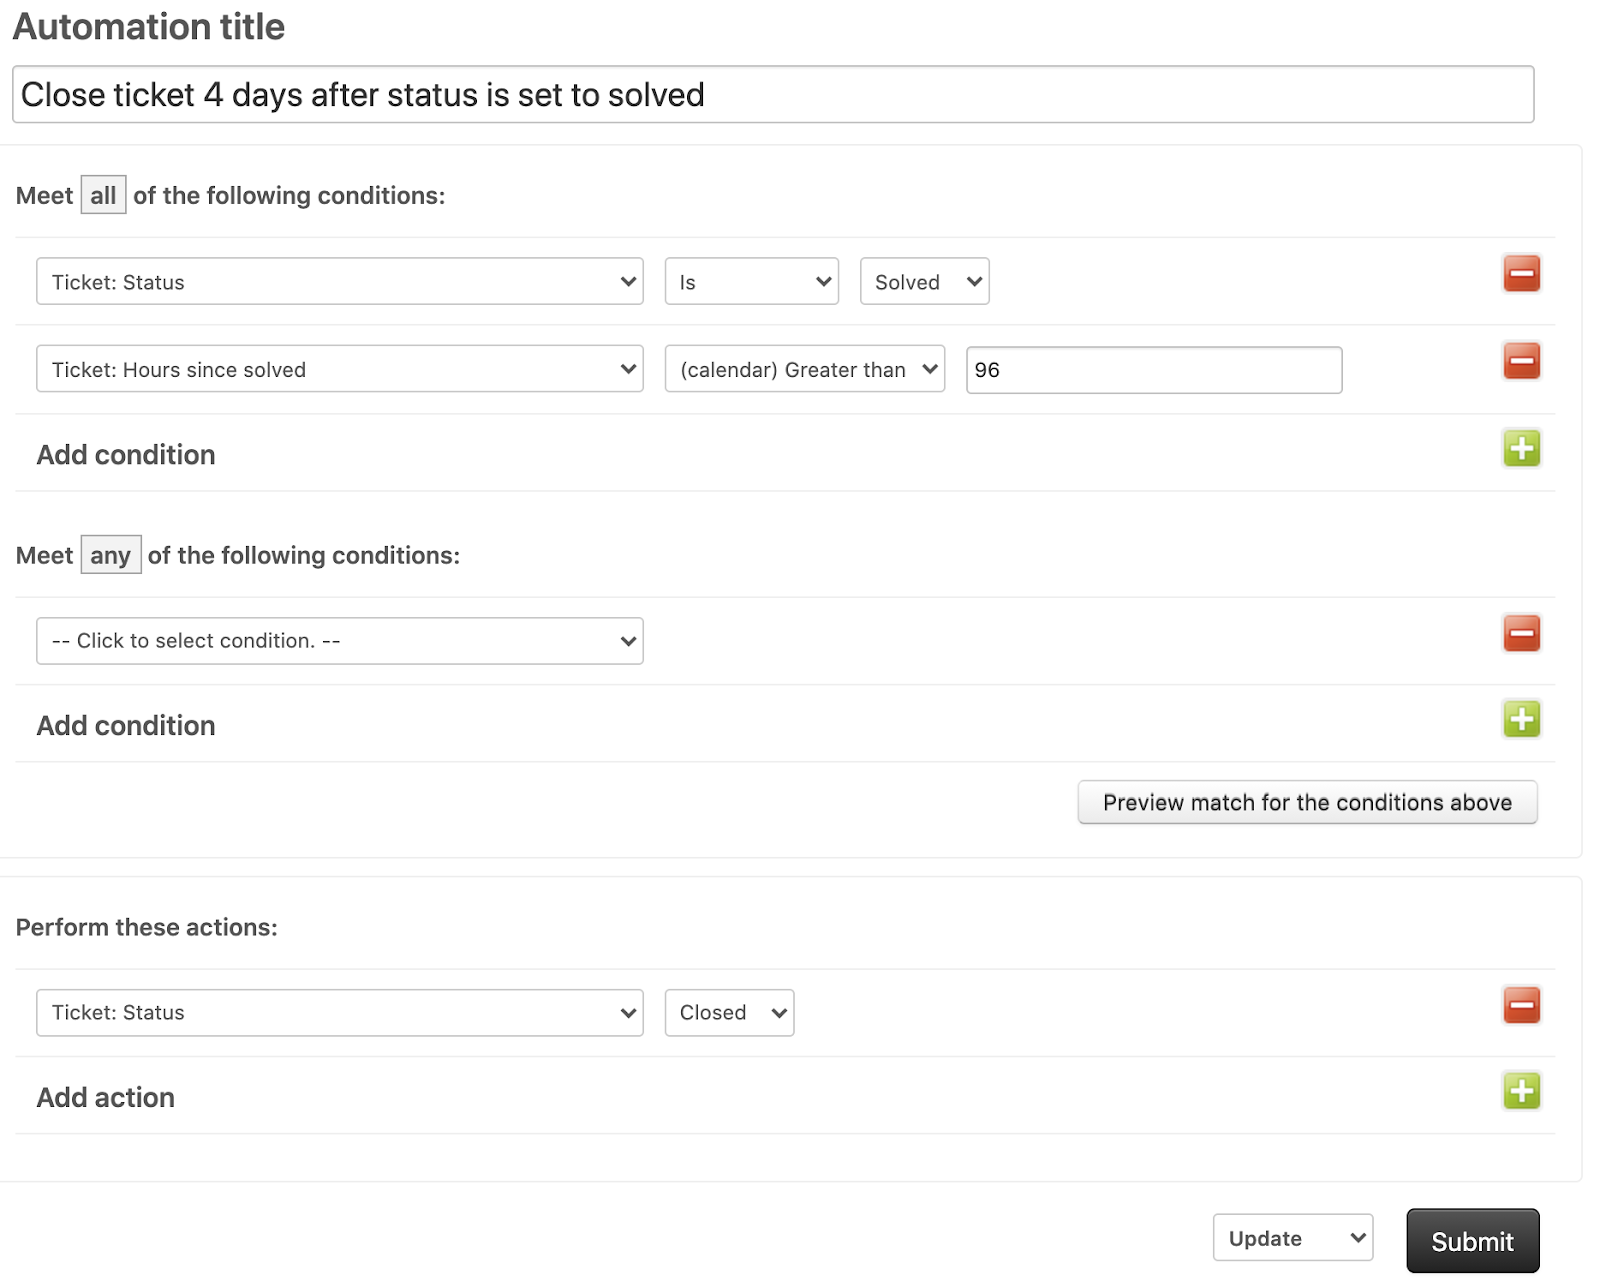
Make sure you enable these automations and adjust them if needed:
- “Close ticket 4 days after it’s solved”: this automaton closes a ticket four days after its status is set to solved. You can change the amount of time to more or less than 4 days.
- “Pending notification”: this automation is disabled by default, and it sends a notification to the user if its ticket is pending for over 24 hours or 5 days. You can adjust the email notification to let them know that the ticket is pending or requires an extra step, like the user providing feedback.
- “Request customer satisfaction rating”: this automation sends the customer satisfaction survey after a ticket is closed. It’s only available for Suite Growth plans and above.
3. Set up the built-in Zendesk triggers
Doesn’t require the Advanced AI add-on
Triggers are automations that execute actions when a ticket meets specific conditions. You can use them to notify customers, route tickets, manage SLAs, and more.
You can create a ticket by navigating to Admin Center, then clicking Objects and Rules > Business rules > Triggers > Add triggers.
When adding a trigger, you will have to define the conditions under which it will fire, and the actions that will be triggered. For example, you can use triggers to notify customers when their ticket is updated or to direct a ticket to the appropriate team member based on conditions like a tag or a subject.
4. Build a conversation bot to deflect simple tickets
Doesn’t require the Advanced AI add-on
You can use the bot builder to customize a chatbot that guides customers to a resolution. Chatbots can be used to welcome customers, gather data, route conversations, notify of updates, and more.
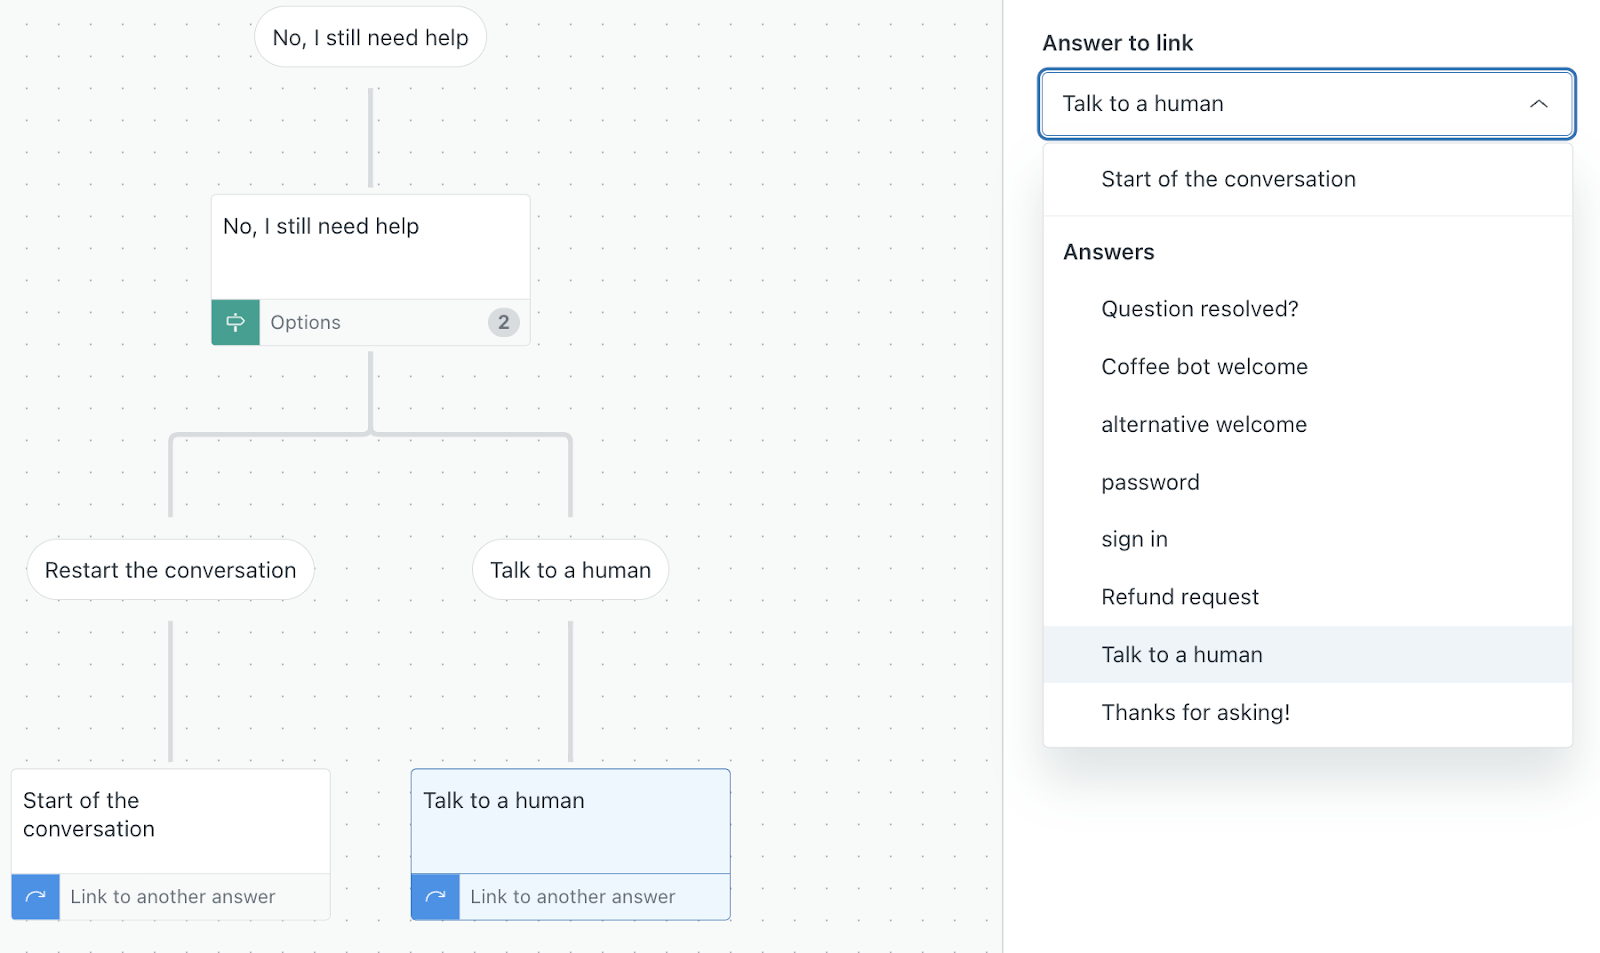
You can create answers and decision trees for your bot using the bot builder. I suggest you check the Zendesk help page for Creating your own answers and using answer templates.
You can add multiple step types to your flow, and each step represents a message that the bot sends to the customer.
Here’s a list of the steps you can use in the builder, with a link to the Zendesk help page on configuring each step:
1. Send a message with a piece of text
2. Present up to 10 quick replies as options for the user to interact
3. Show up to 6 help center articles to the customer
4. Add a carousel with up to 10 informational panels
5. Ask for details and add the information to the generated ticket
6. Ask if a question has been resolved
8. Escalate the conversation to an agent (or use Next Matter to trigger a workflow)
9. Add conditional logic to the answer flow
10. Use your business hours as a condition for the answer flow
11. Link to another answer in the same bot
5. Enable email auto-replies to suggest articles and self-serve tickets
Doesn’t require the Advanced AI add-on
All Zendesk plans also give you the option to send email auto-replies that suggest articles for solving a ticket.
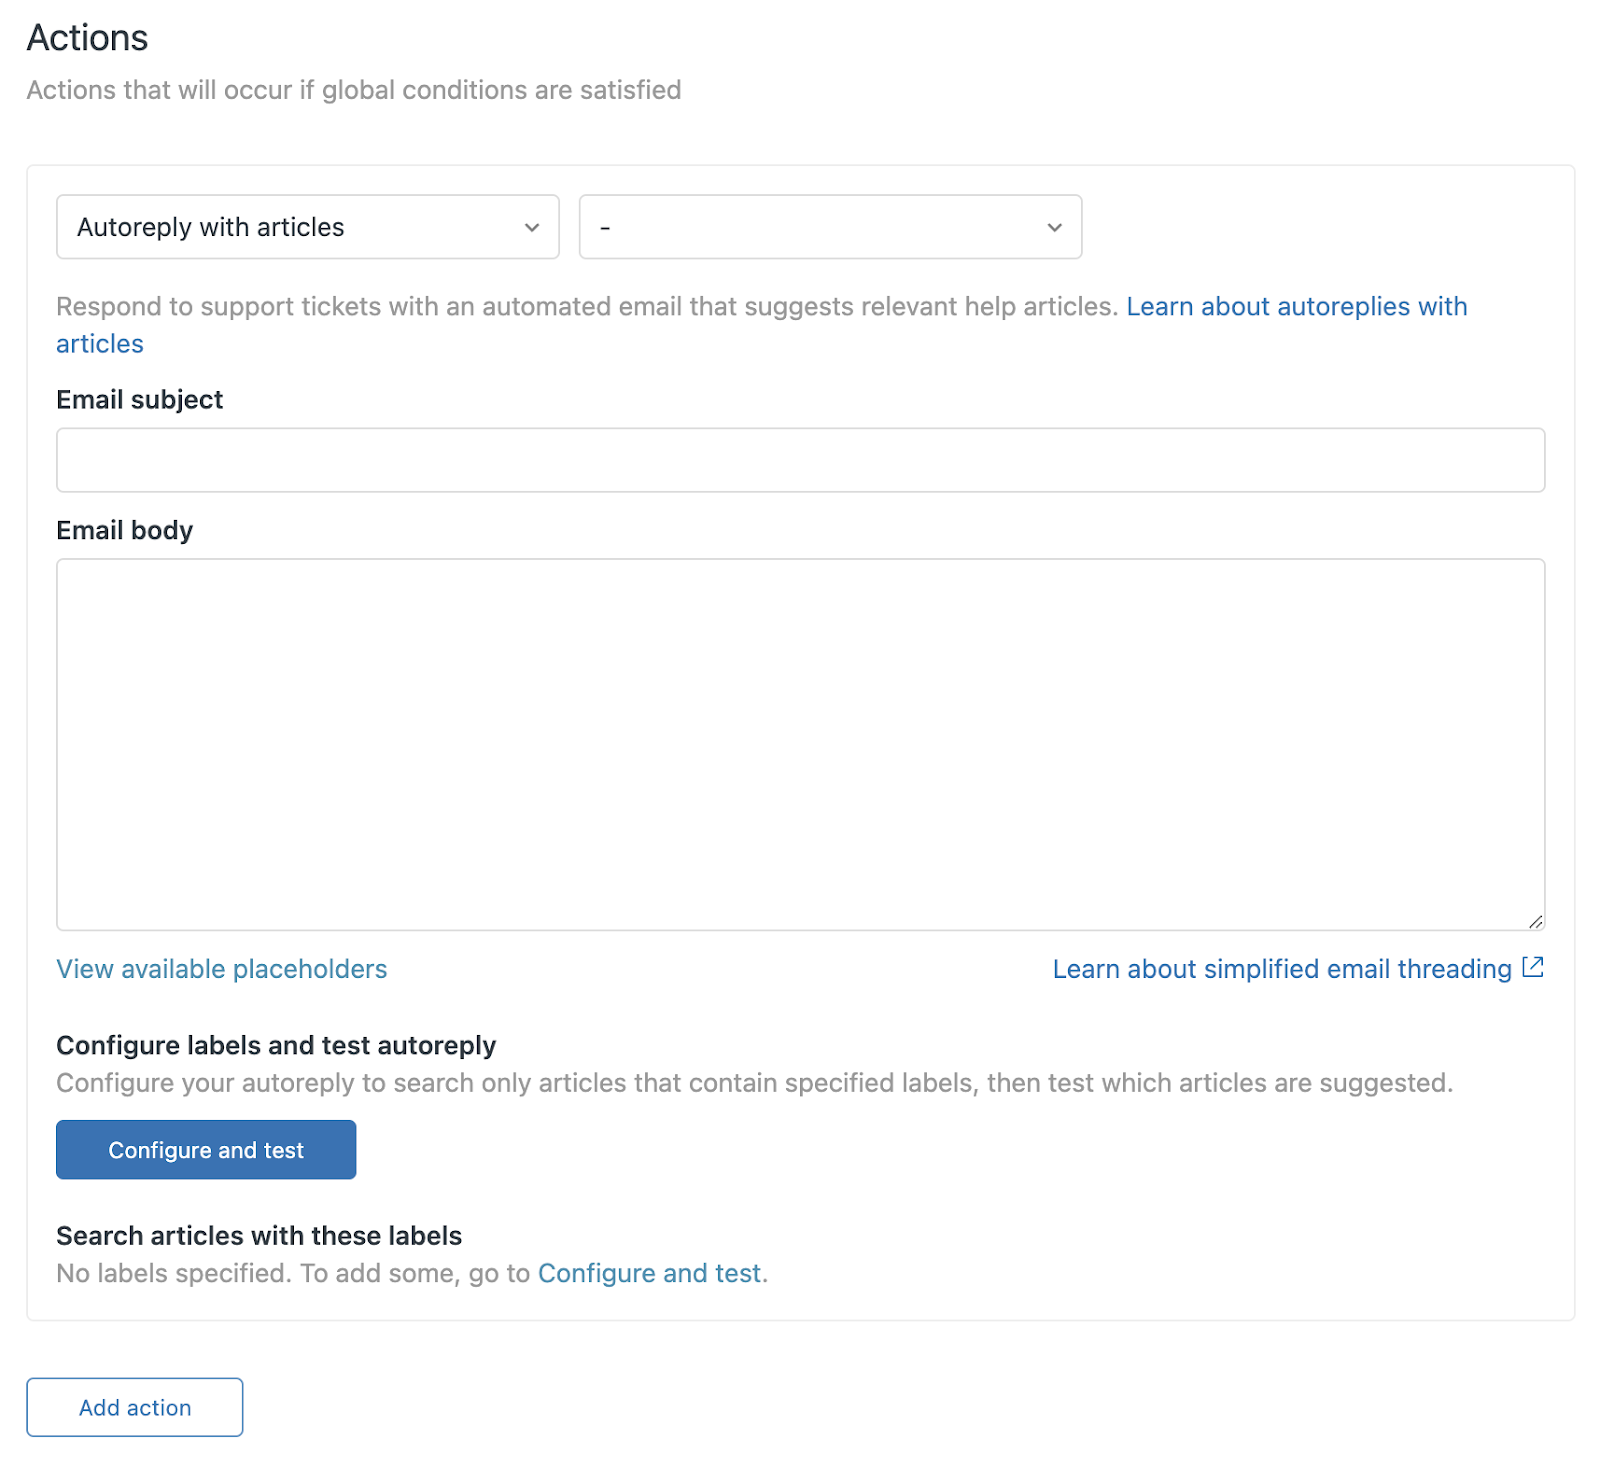
You can build an autoreply by creating a trigger for automatic ticket updates, then configuring:
- A trigger condition: for example, launch the trigger as soon as a user submits a ticket
- A trigger action: you can choose Autoreply with articles, which will allow you to create an email (with subject and body) where you can use placeholders that include suggested articles.
Some of the placeholders you can use are {{autoreply.article_list}} (which uses AI to show three articles that match the ticket request) and {{autoreply.first_article_body}} (which displays the entire body of the first matching article within the email). You can see more placeholders on this Zendesk help page.
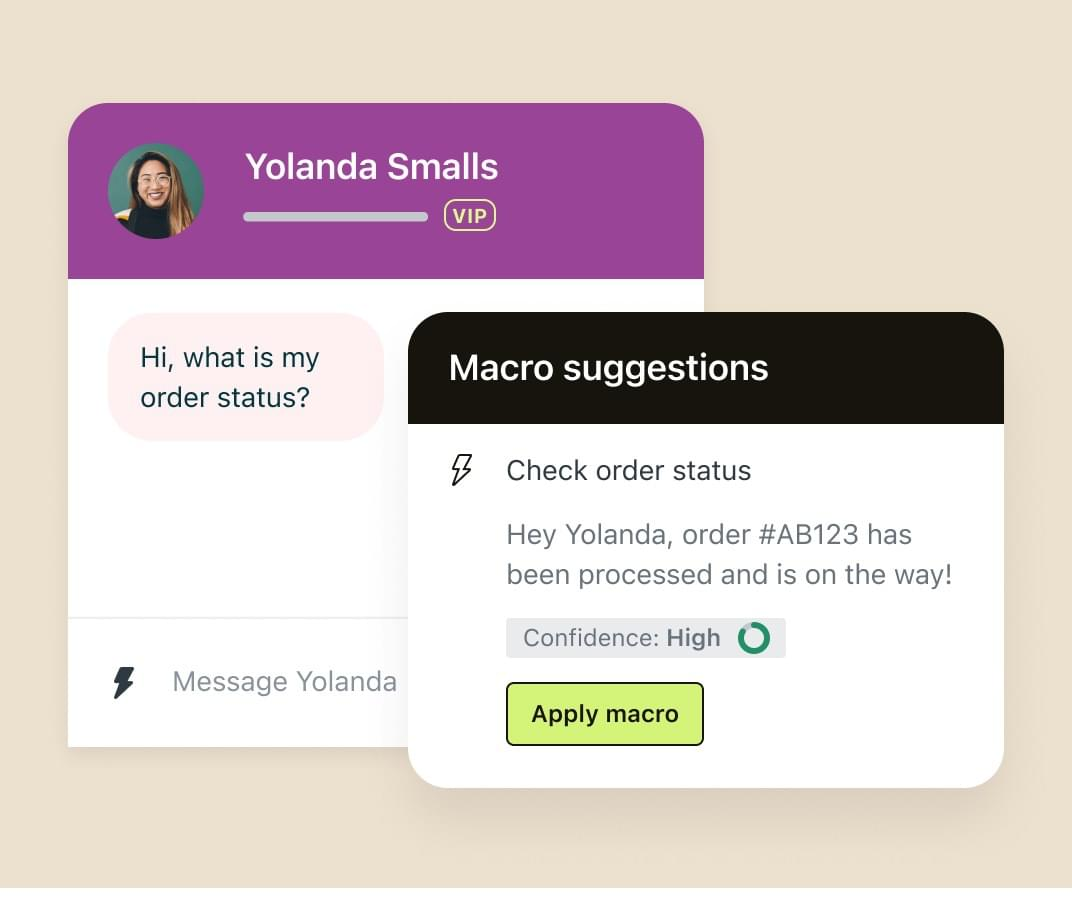
6. Use suggested macros for CS agents dealing with simple tickets
Only available for plans Professional and above
Macros are standard responses and actions that your agents can use repetitively to solve support requests. You can create macros for tasks like changing the assignee, adding followers, updating ticket fields, or adding attachments to tickets. See the Zendesk help page on creating macros.
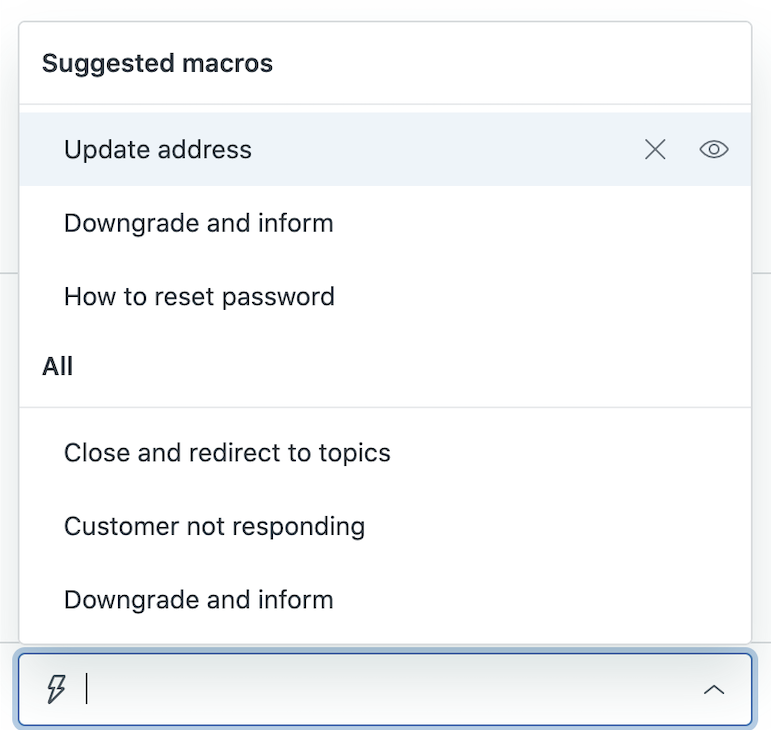
As part of Zendesk AI, you can enable suggested macros and see actions that match the ticket you’re managing. As you select the suggestions that Zendesk offers, machine learning will improve the quality of those suggestions over time.
Automating complex tickets & escalations (with Next Matter)
Doesn’t require the Advanced AI add-on
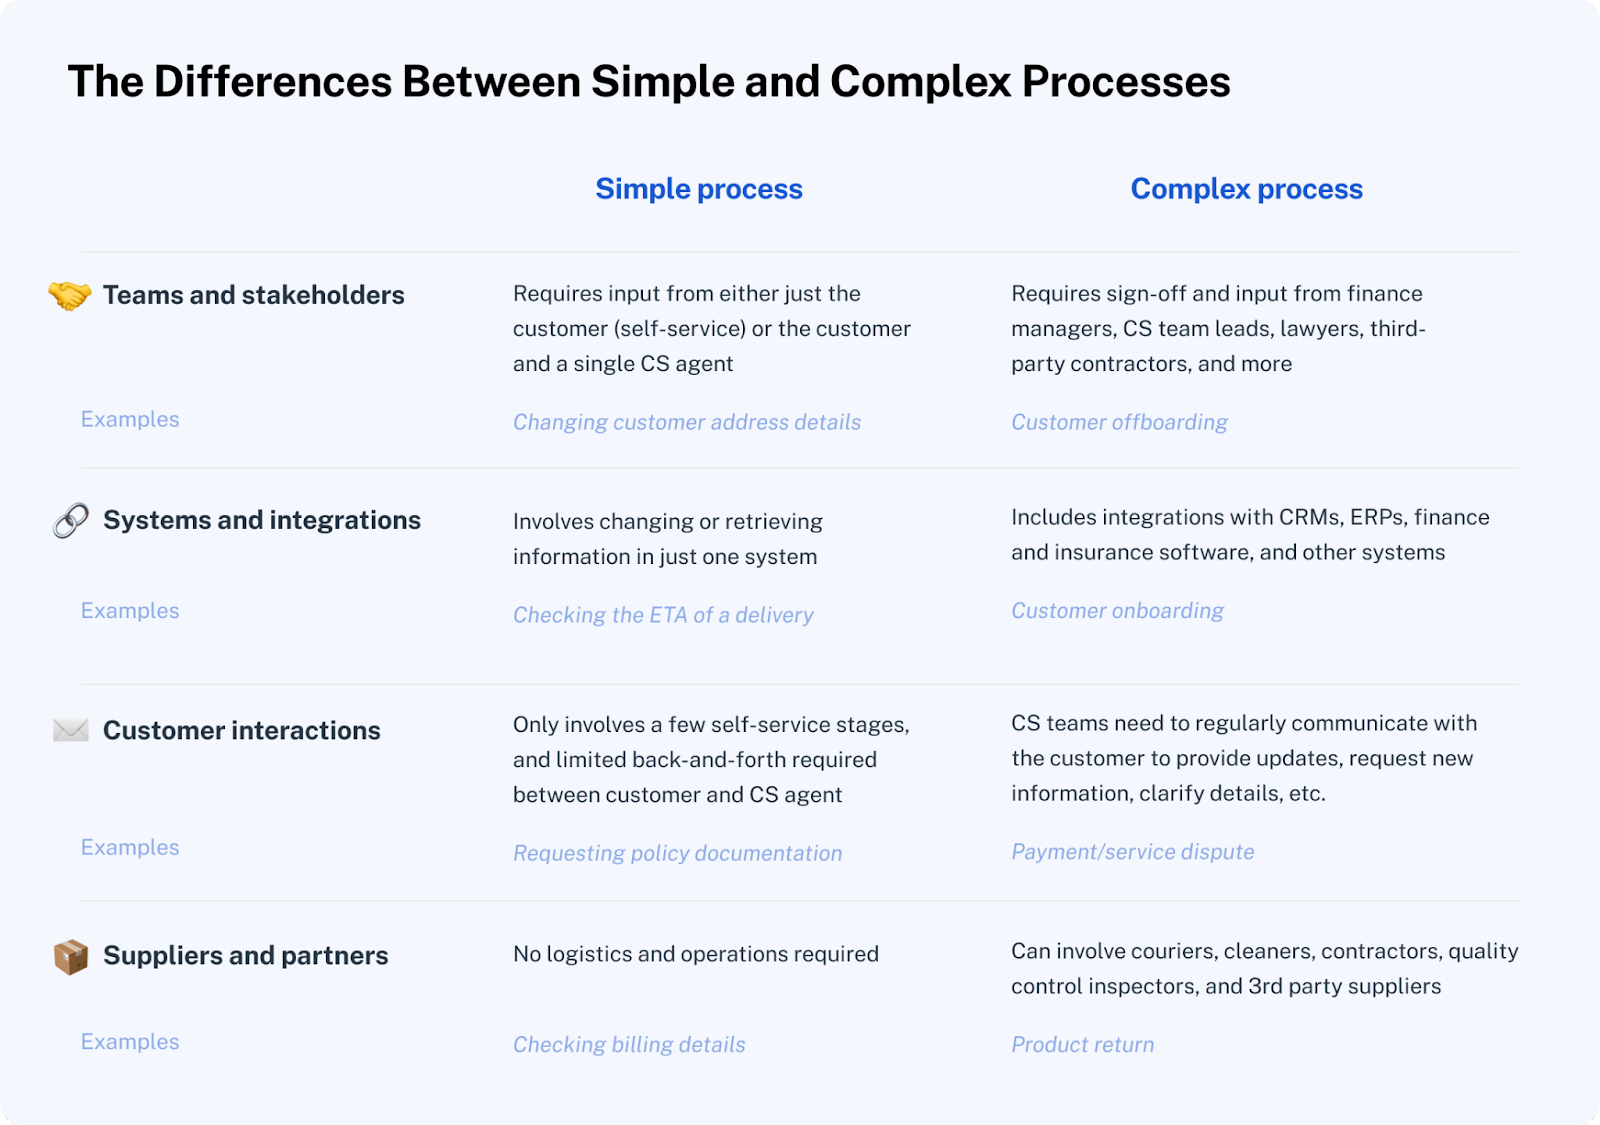
If we move from a simple ticket, like checking the status of an order, to a complex one, like returning a product, automation becomes increasingly complex too.
To define what a complex ticket is, you can look at the criteria we use for complex processes: applied to this example, a product return can require input from multiple team members, an integration with a CRM or ecommerce system, several communication stages, and 3rd-party suppliers and couriers.
To automate these complex tickets that involve multiple stakeholders, you will need to use Next Matter. You can request a demo here.
Once your account is set up, visit the Zendesk Marketplace to get the Next Matter sidebar app. Then, in your Next Matter portal, navigate to Company > Integrations > Connect to Zendesk. See this guide to connect to Zendesk using OAuth, and after that, you will see the Next Matter sidebar when you open Zendesk.
Next, you have to build the actual Next Matter workflow that you’ll trigger from Zendesk. If you want to automate product returns, then you need to create a workflow with all steps up to the ticket resolution.
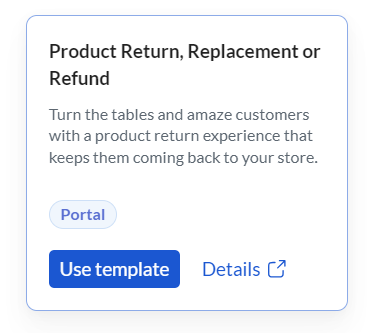
You can use a guide like Building your first Next Matter workflow, but we’ll go with a much easier approach: some workflows, like a product return, are already built in the automations library, so you simply click on Use template.
Now, it’s time to make a ticket trigger that automated workflow. You can use the Next Matter sidebar widget when viewing a ticket: search for the workflow you’d like to start (product return), press Link to run the workflow for this specific ticket, and then press Open to see the actual workflow in Next Matter.
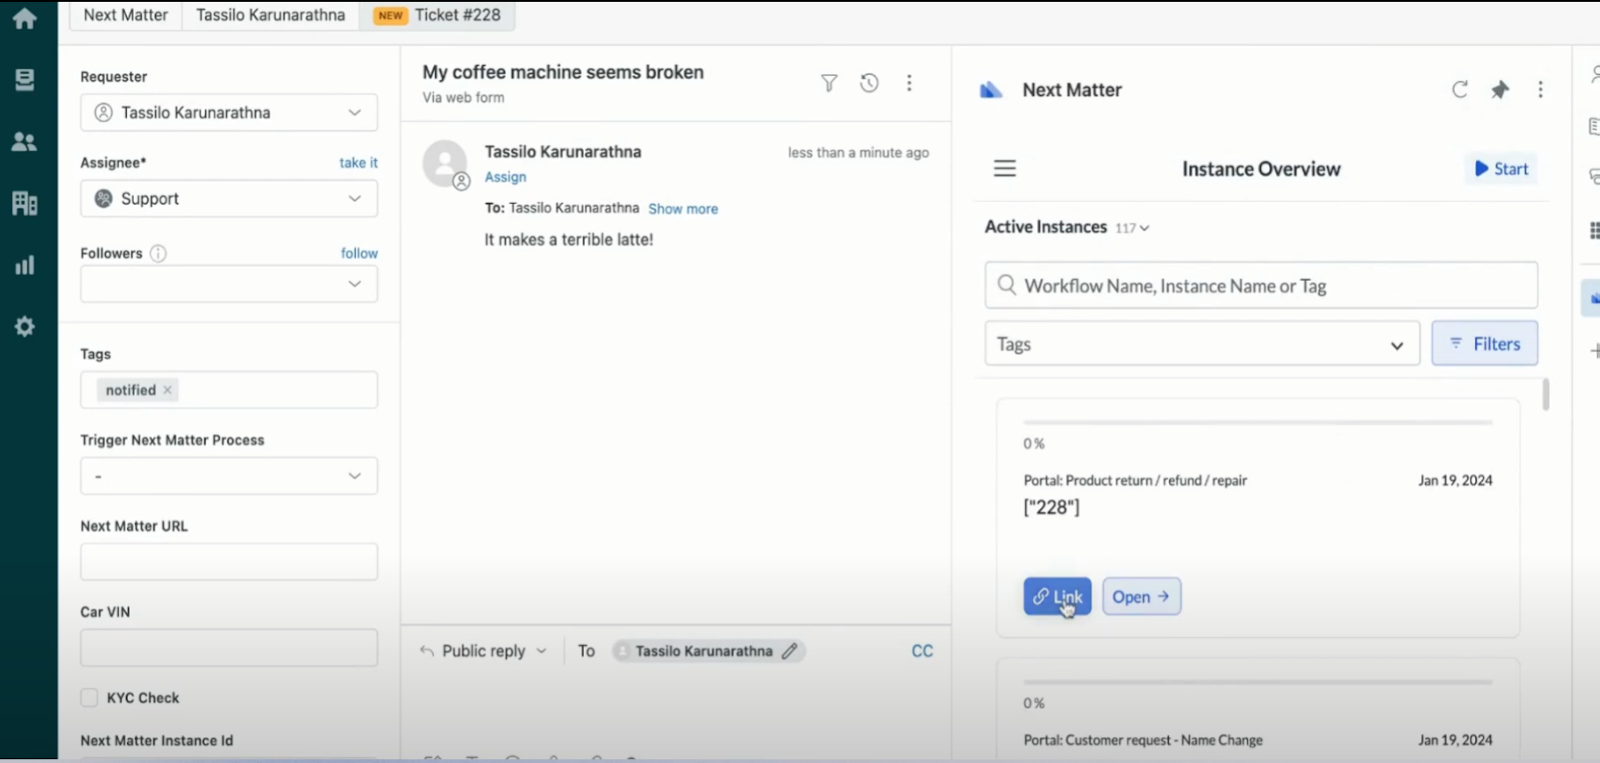
Now, it’s time to start a workflow instance from a Zendesk ticket. To do this, make sure that the first step in the workflow (on Next Matter) contains a form field where you can write the Zendesk ticket ID.
After this, you can use Next Matter to fully track and resolve the ticket:
Extra steps for Advanced AI add-on users
There are a few interesting automation tools within the Advanced AI add-on, which expands the features already built within Zendesk AI.
The add-on is priced at $50 per agent/month. You can only buy it if your plan is Suite, Support Professional, or above. Let’s look at the features it includes:
7. Automatically triage tickets
Intelligent Triage is perhaps the most exciting feature within the Advanced AI add-on. It uses AI to predict customer intent, language, and sentiment from your tickets and comments.
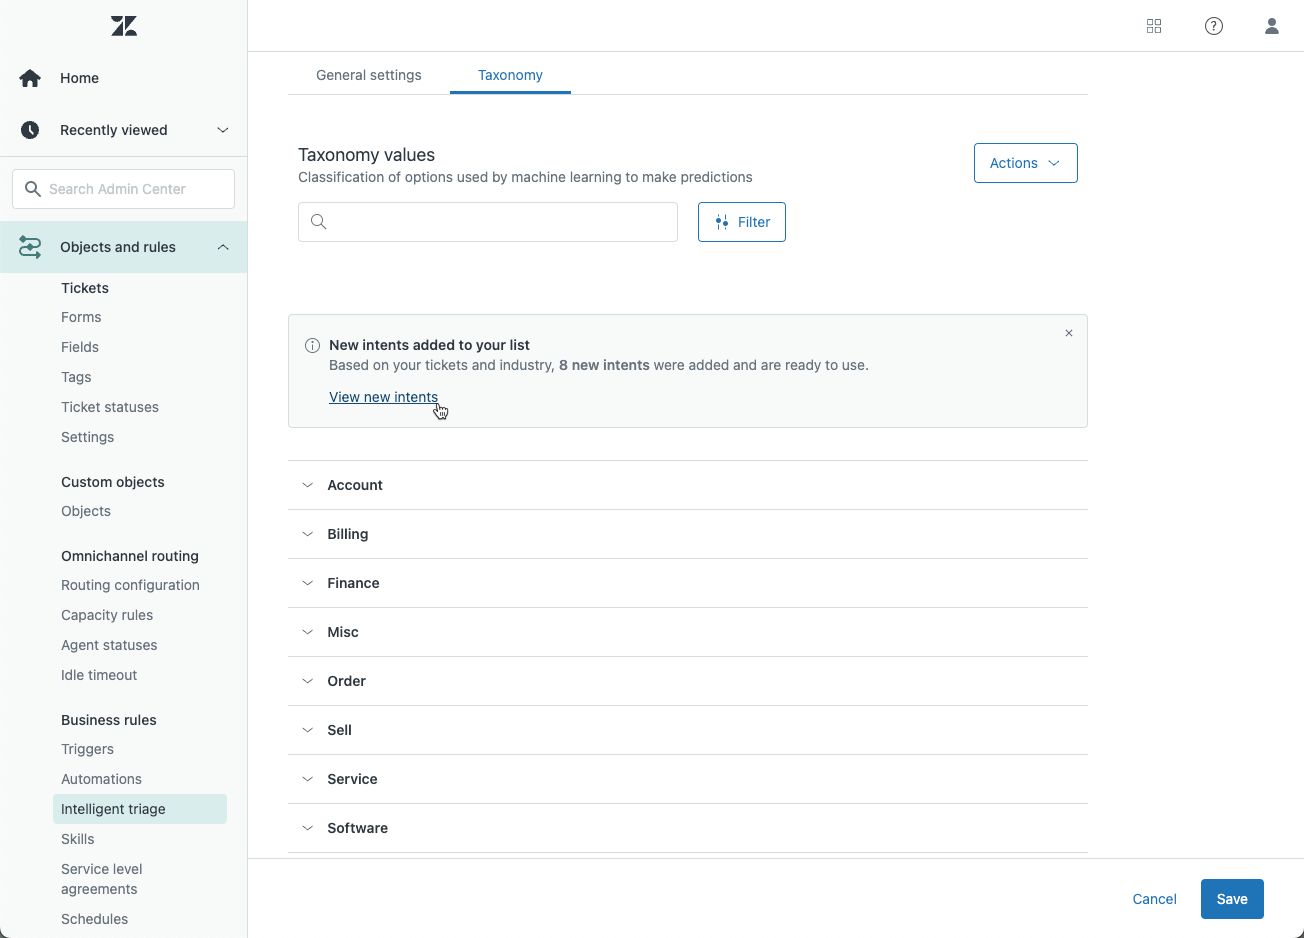
To start using Intelligent Triage, navigate to Objects and rules within the Admin center, then Business rules > Intelligent Triage.

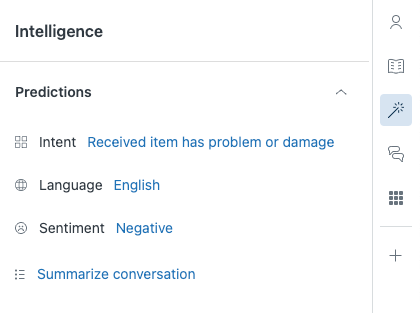
After enabling this feature, you will see new fields within all your tickets. Here’s what AI predicts:
- The language in which the ticket is written
- The sentiment (how the customer feels) for the ticket, ranging from Very Positive to Very Negative
- The intent (what the ticket is about), which can belong to taxonomies like Account, Billing, Finance, Misc, Order, Sell, Service, Software, and more.
On top of this, you also see the level of confidence for the values in the three fields above.
Intelligent triage opens up lots of possibilities. For example, you could combine this with a trigger that starts a Next Matter workflow if a Very Negative ticket comes up for a customer that you identify as a key account, routing it directly to a senior CS agent.
8. Enable Advanced autoreplies
If you have enabled intelligent triage, you can also set up advanced autoreplies. These autoreplies differ from the standard ones (which only provide predefined replies) in that they can deliver fully customized responses based on the predicted language, intent, and sentiment.
You can use advanced autoreplies in combination with triggers, which will now display the Autoreply action. You will have to select some conditions (e.g., deliver a specific autoreply for Very Negative sentiment and Account intent) and write the reply message yourself.
Extra steps for Early Access Program (EAP) users
If you join the Zendesk Generative AI EAP, you get access to message and call summaries. This interesting feature will become available only within the Advanced AI add-on as soon as it leaves the EAP program, so I suggest you try it.
With the GenAI features, you can summarize, expand, or enhance the comments that have been added to a ticket, which helps you in several ways:
- Summarizing a ticket helps your agents handle it with speed. After joining the EAP, you simply have to click Intelligence within the sidebar for a ticket, then Summarize conversation.
- Expanding or enhancing are available within the composer when you’re replying to a comment. You can either develop your own prompt (and turn it into a full message) or make it friendlier or more formal.

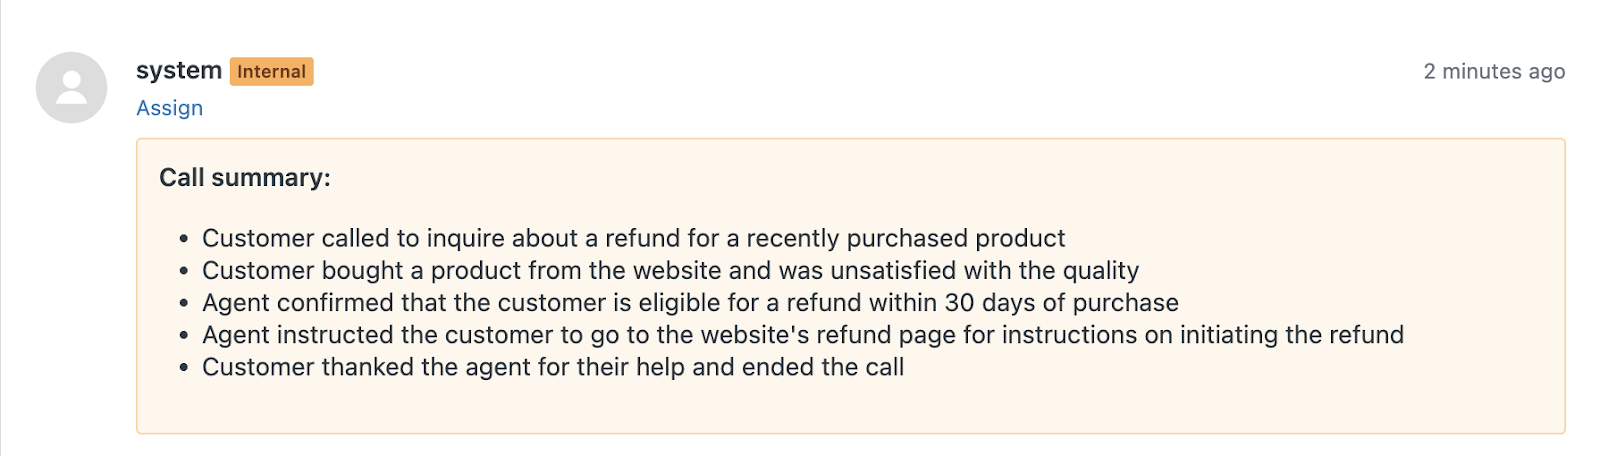
Another interesting feature within the GenAI EAP is call summaries. You can enable them by going to Settings within your Talk channel, then enabling Transcribe and summarize calls using Generative AI.
After this, all recorded calls will display summaries and transcripts as internal notes for your agents to see.
Final Thoughts
Zendesk is a giant help desk. As a customer support suite, it provides a versatility that would require 10+ individual tools to achieve just the same.
The downside of having such a large offering is that the learning curve to master the toolkit (and optimize it with automations) can be daunting. This article covers the basic opportunities for automating that make the most impact on your CX operations.
Of course, some complex tickets need third-party apps to be fully automated. If you need only one app for Zendesk, then Next Matter can do the heavy lifting for turning your tickets into automated workflows that engage different teams and integrations.


.jpg)